

Well, this is an amendment to my write-up on installing plcman's Paddle Shifter Wiring harness - but that thread was just too chock full.
So for this thread, I'm going to explain how to install paddle shifters into your steering wheel, and how to make the necessary electrical connections. We're starting with a steering wheel removed.
Once the wheel is out, take a look at how the wiring is routed, and make a note for when you reassemble it. There are pictures at the end that you can refer to as well.
-----------------------------
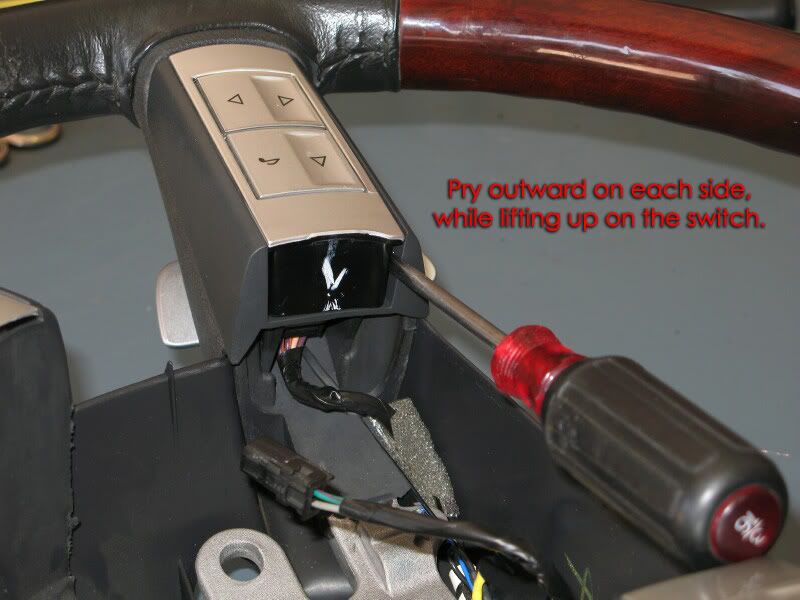
To remove the wheel-mounted switches (if you have them), simply pry gently outward on each side, while you lift the switch from below:
![Image]()
Remove the four silver Phillips-head screws that mount the rear shroud to the steering wheel, and set the shroud and wiring harness aside.
Here's how the wheel looks when it's nekkid:
![Image]()
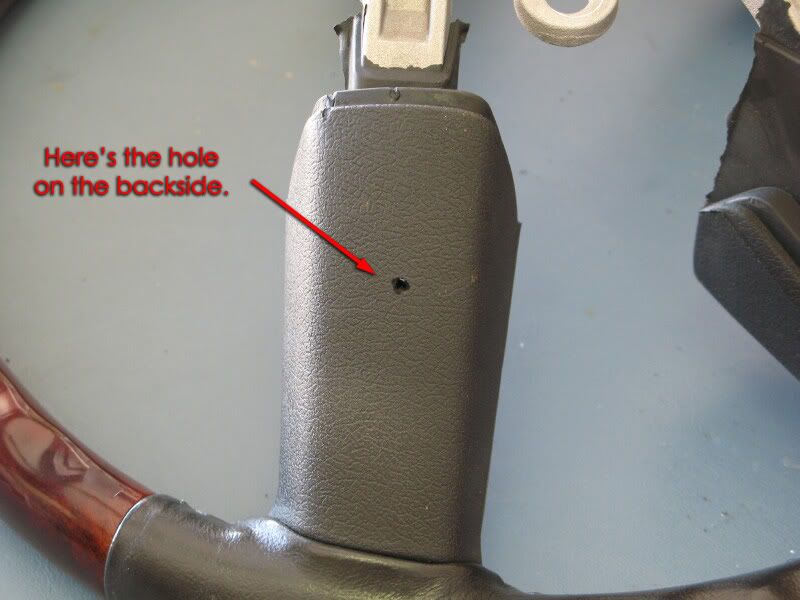
Here you can see where to drill the mounting holes through the steering wheel. Use a 5/32" drillbit, and drill through right at the inside corner. The hole should be approximately perpendicular to the REAR of the wheel.
![Image]()
![Image]()
Take an X-acto knife with a brand-new blade, and carve out a bit from around the hole.
![Image]()
You're going to temporarily mount the paddle, so you can trace around it.
![Image]()
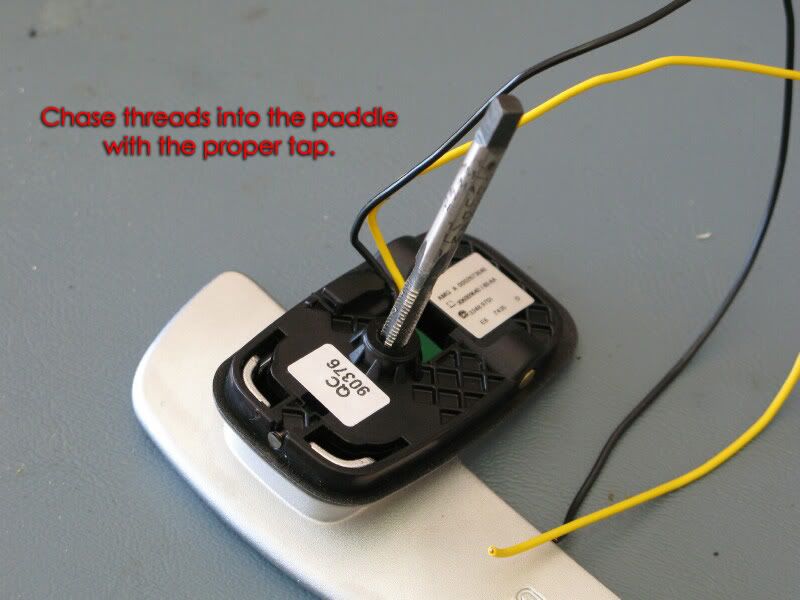
Take a tap (M4 x .7, in this case - but match it to the screws you'll use), and create some threads in the mounting hole.
![Image]()
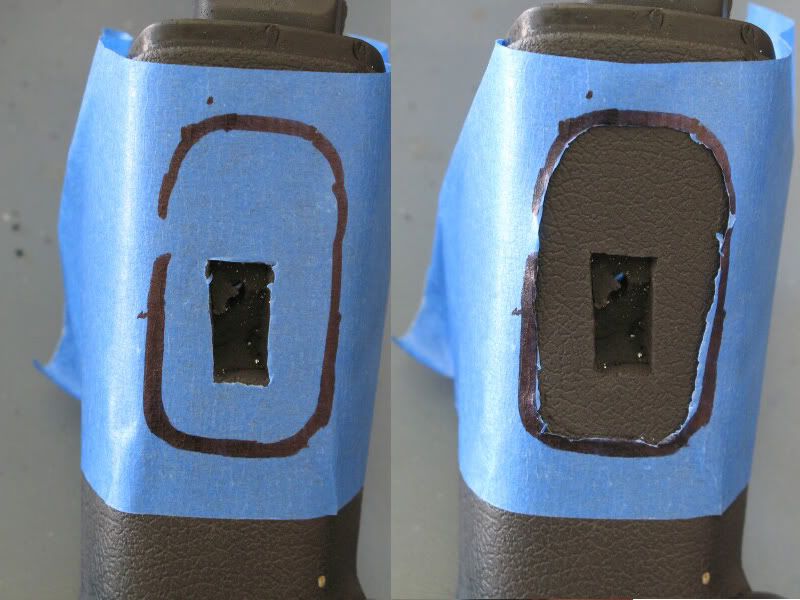
Mount the paddle temporarily using a longer screw or the tap. It will NOT sit down inside the wheel - it will rest on top of it - you need to trace around the black inner surface to make an outline. Make sure the paddle is aligned the way you want it before you trace the outline.
![Image]()
Remove the paddle after marking the outline, and here's where the cutting starts. You want to cut straight down into the foam, as deep as you can until hitting the aluminum frame. Use a sharp X-Acto knife, and replace it if the cutting gets hard. A new blade should cut through cleanly.
Cut perpendicular to the mounting surface, and follow the inside of the outline you made.
![Image]()
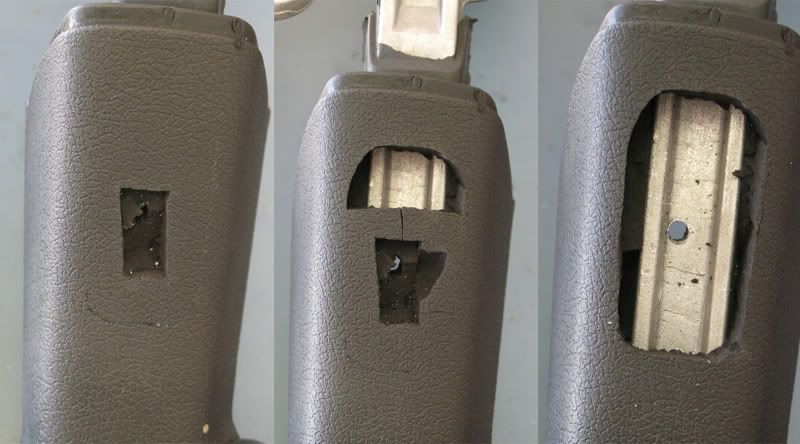
Make some sectional cuts once the outline is done - this makes it easier to remove the foam in pieces. Use needle-nose pliers or similar.
![Image]()
To test-fit the paddles, route the wires through the mounting hole, and stretch the foam with the paddle, as you wiggle it in there.
![Image]()
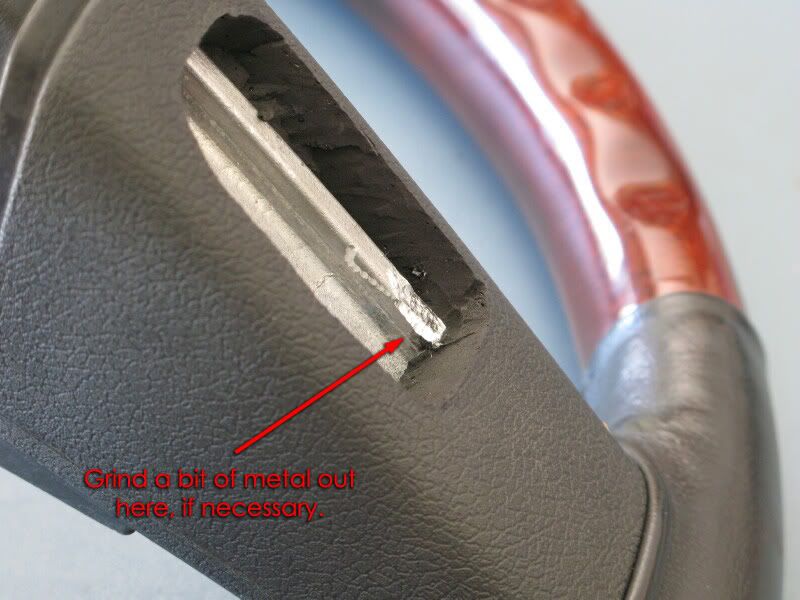
You can test the operation of the paddles at this point, but they will pop out if you're not careful. If they sound like "Tank! Tank!" versus "Dunk! Dunk!" when you operate them, you can remove a bit of material from the contact point:
![Image]()
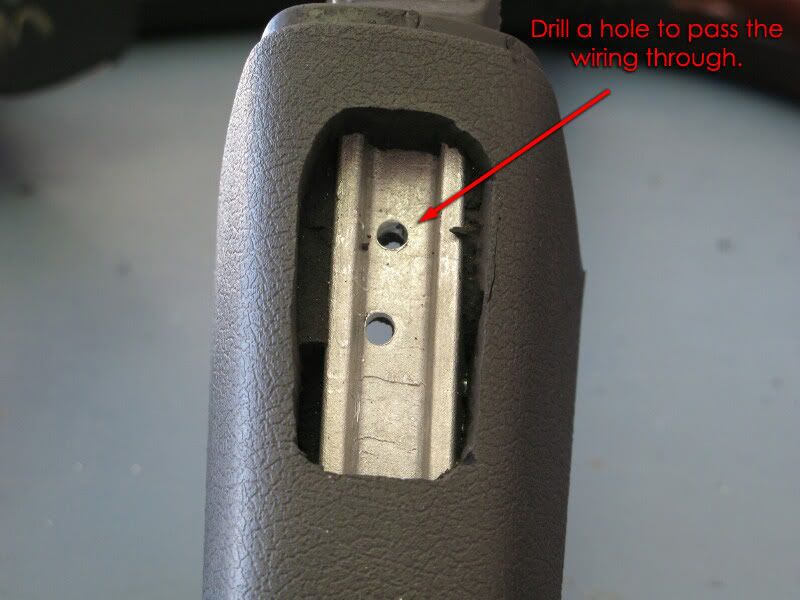
If the fit is good, go ahead and drill another hole for the wires to pass through.
![Image]()
Since the wires will pass through the metal frame, you need to protect them with heatshrink or electrical tape.
![Image]()
Here is the wheel with paddles mounted and wiring passed through:
![Image]()
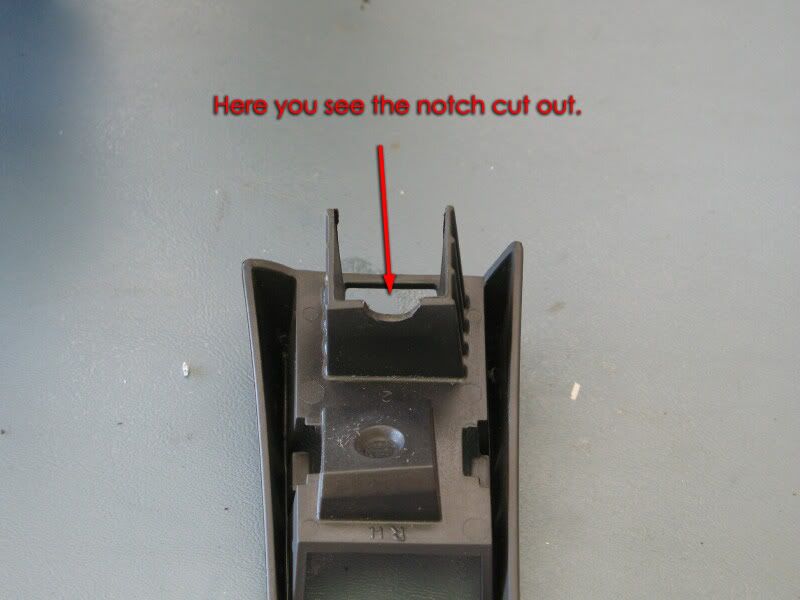
When you go to reinstall the switch holders, they may contact the screwhead.
![Image]()
If so, take a Dremel and carve out a notch as shown:
![Image]()
![Image]()
Next post: All the electrical inside the wheel.
So for this thread, I'm going to explain how to install paddle shifters into your steering wheel, and how to make the necessary electrical connections. We're starting with a steering wheel removed.
Once the wheel is out, take a look at how the wiring is routed, and make a note for when you reassemble it. There are pictures at the end that you can refer to as well.
-----------------------------
To remove the wheel-mounted switches (if you have them), simply pry gently outward on each side, while you lift the switch from below:
Remove the four silver Phillips-head screws that mount the rear shroud to the steering wheel, and set the shroud and wiring harness aside.
Here's how the wheel looks when it's nekkid:

Here you can see where to drill the mounting holes through the steering wheel. Use a 5/32" drillbit, and drill through right at the inside corner. The hole should be approximately perpendicular to the REAR of the wheel.

Take an X-acto knife with a brand-new blade, and carve out a bit from around the hole.

You're going to temporarily mount the paddle, so you can trace around it.

Take a tap (M4 x .7, in this case - but match it to the screws you'll use), and create some threads in the mounting hole.
Mount the paddle temporarily using a longer screw or the tap. It will NOT sit down inside the wheel - it will rest on top of it - you need to trace around the black inner surface to make an outline. Make sure the paddle is aligned the way you want it before you trace the outline.

Remove the paddle after marking the outline, and here's where the cutting starts. You want to cut straight down into the foam, as deep as you can until hitting the aluminum frame. Use a sharp X-Acto knife, and replace it if the cutting gets hard. A new blade should cut through cleanly.
Cut perpendicular to the mounting surface, and follow the inside of the outline you made.
Make some sectional cuts once the outline is done - this makes it easier to remove the foam in pieces. Use needle-nose pliers or similar.
To test-fit the paddles, route the wires through the mounting hole, and stretch the foam with the paddle, as you wiggle it in there.

You can test the operation of the paddles at this point, but they will pop out if you're not careful. If they sound like "Tank! Tank!" versus "Dunk! Dunk!" when you operate them, you can remove a bit of material from the contact point:
If the fit is good, go ahead and drill another hole for the wires to pass through.
Since the wires will pass through the metal frame, you need to protect them with heatshrink or electrical tape.

Here is the wheel with paddles mounted and wiring passed through:

When you go to reinstall the switch holders, they may contact the screwhead.
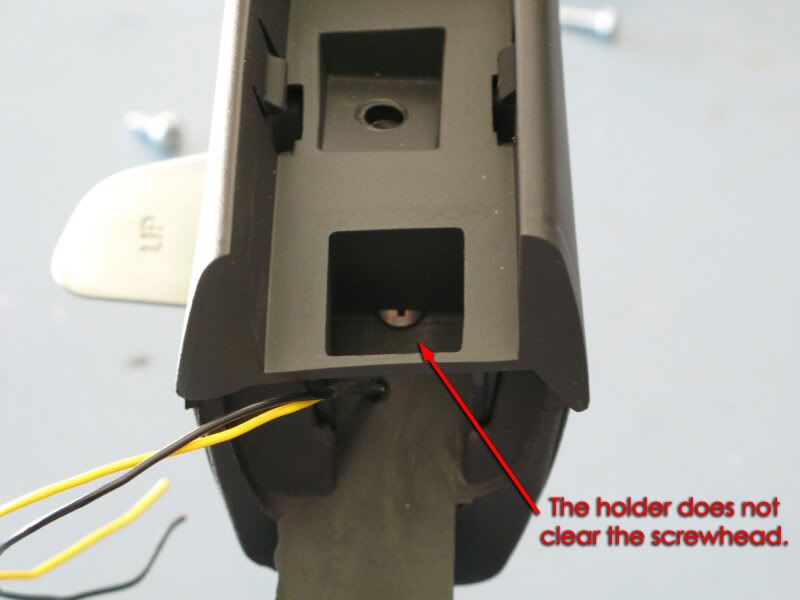
If so, take a Dremel and carve out a notch as shown:

Next post: All the electrical inside the wheel.


")


