
This mod is intended to be an enhancement for the ShiftHammer. It is intended to be used for drivers whose hand positions during driving are not interfered by shift paddles causing safety concerns. I will not be responsible for the acts and safety of drivers who choose to copy this mod.
![Image]()
![Image]()
This mod took me about 4 hours, but I spent 15 minutes waiting for the airbag to disarm, a lot of time thinking, test fitting different length screws, and exploring different methods. I expect with the instructions and an impact wrench, it should take about 2 hours.
Here are the tools you will need:
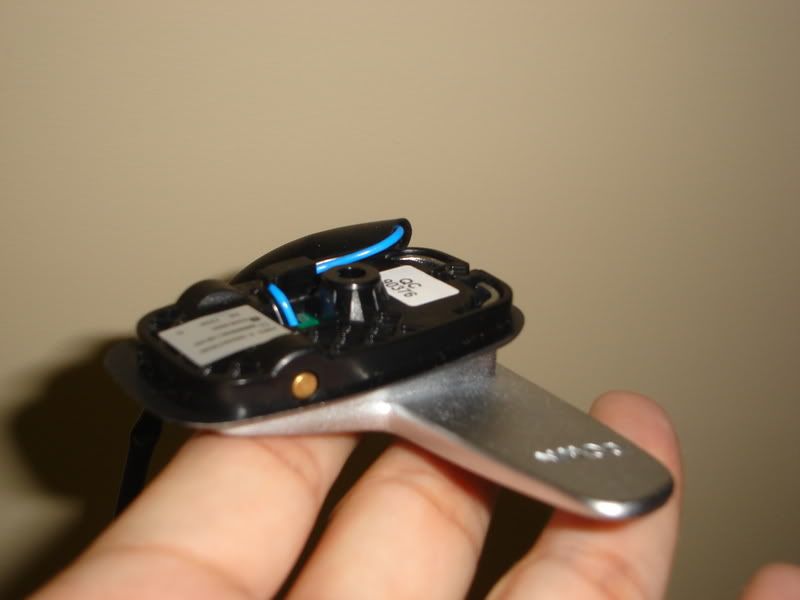
1 pair of Mercedes AMG S63 Aluminum Shift Paddles
![Image]()
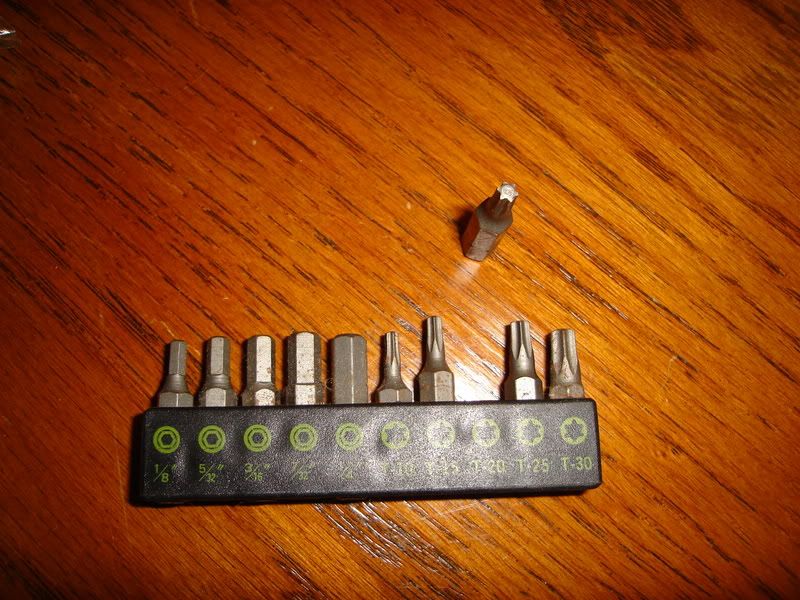
10mm Hex bit for the steering wheel screw
blue Loctite
T-20 Torx bit
![Image]()
11/64" drill bit
3/16" drill bit
modelling xacto blade
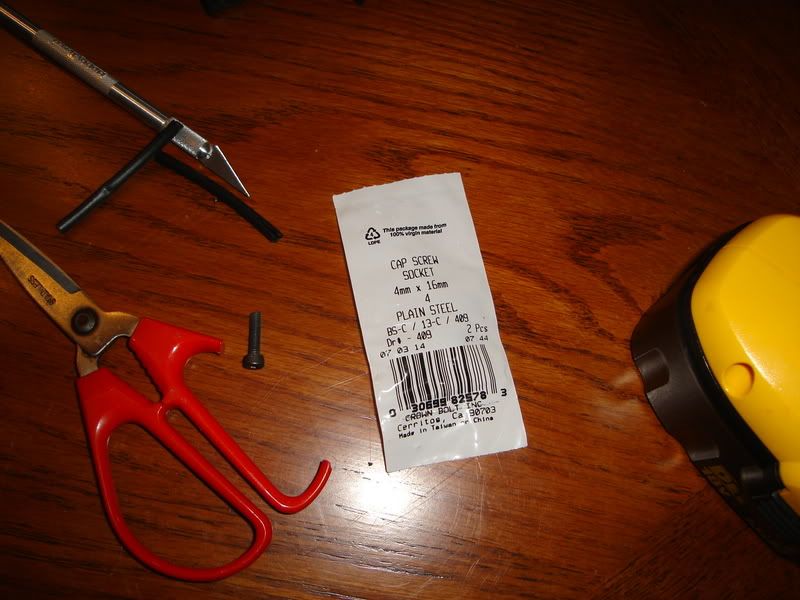
Here are the screws you will need to buy:
two 4mm x 16mm long cap screw socket
(Home Depot UPC code 30699 82578)
![Image]()
WARNING, do not use philips flat head for countersunk holes, you WILL strip it. Been there, done that. Poor fit, had to buy extractor.
Instructions:
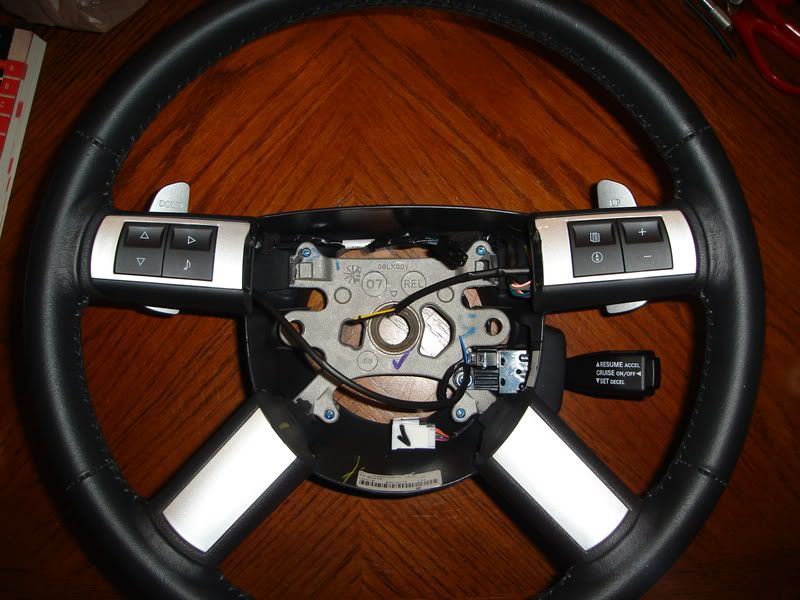
1. Remove the steering wheel. Follow instructions from other posts.
2. Remove the audio control modules.
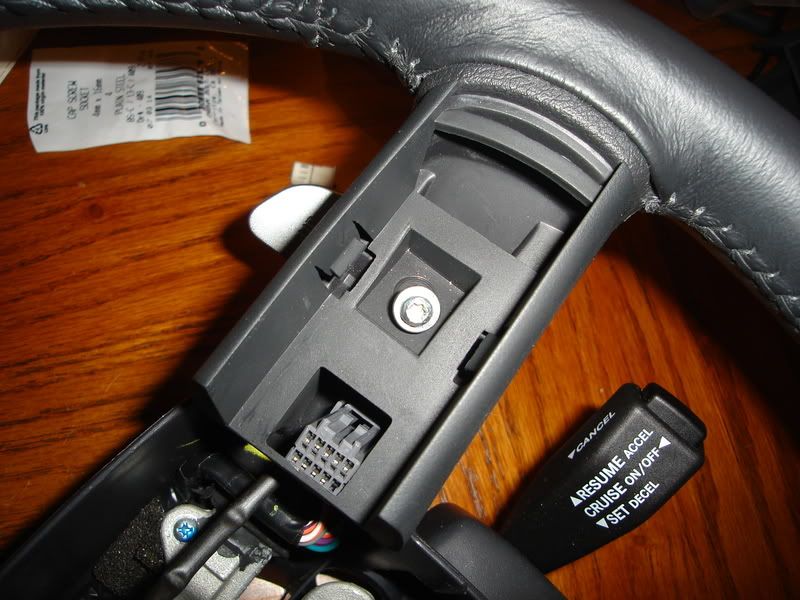
3. Using the T-20 Torx bit, unscrew the Torx screw behind and remove the audio control module bracket.
![Image]()
4. Put on eye protection.
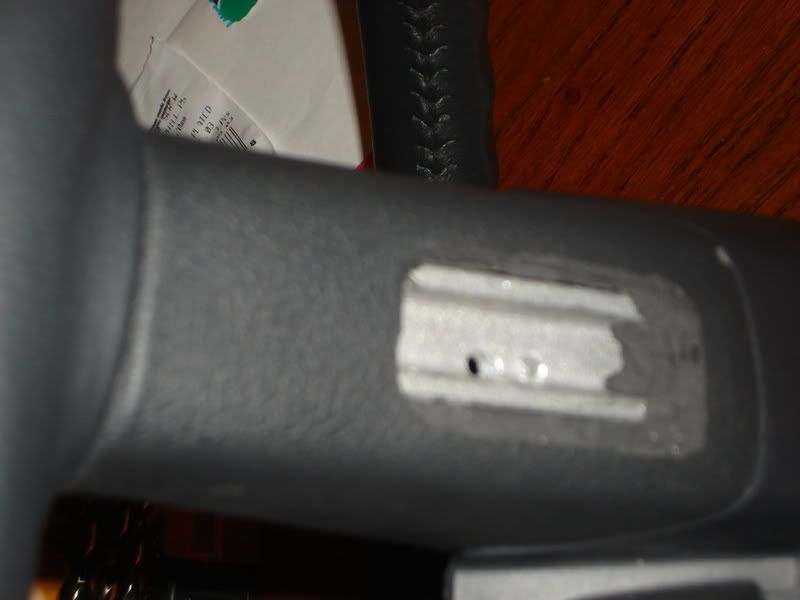
5. Use the corner of a table, use one hand to hold down the steering wheel by the spoke, making the back of the spoke (where the shifter is going to be) flat and horizontal to the table. With the other hand, drill a 3/16" hole at the ridge as shown, as straight to the back as possible.
![Image]()
If
![Image]()
you do not want to damage the table, you can stop as soon as you have drilled thru the metal (about 1/2" or 10mm deep). You should be able to feel it. This will be used to mount the paddles.
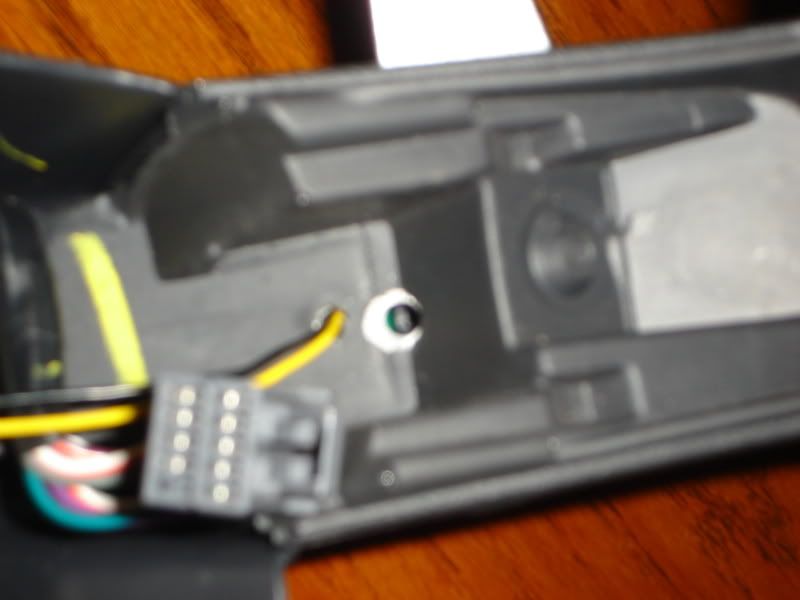
6. At about 1/2" from the 3/16" hole towards the center of the steering wheel drill a 11/64" hole. This is to feed the control wires thru.
7. With a phonebook behind the spoke to protect the table, drill all the way thru the 3/16" with the 3/16" bit, try to be perfectly perpendicular with the phonebook.
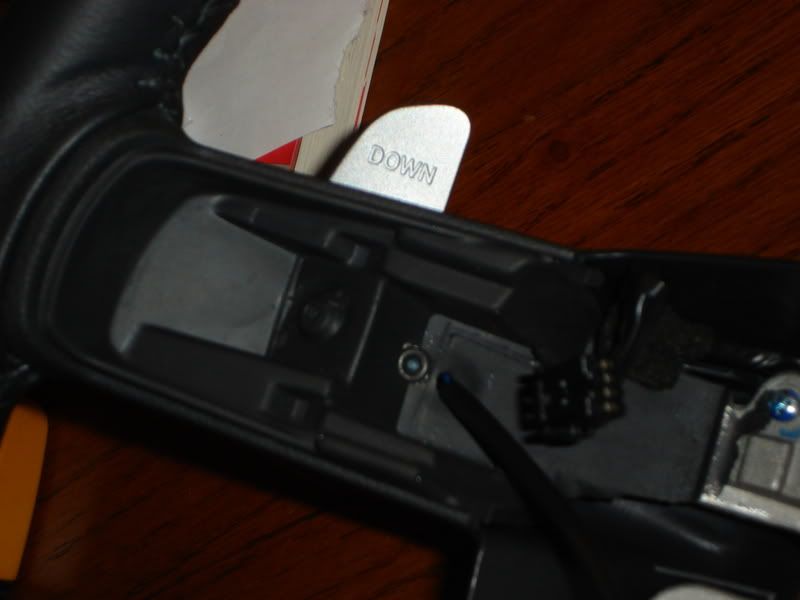
8. Use the thru hole on the back of the spoke to line up with the shift paddle screw hole, and start cutting the foam, beginning with a hole about 5mm undersize on all sides.
9. Keep digging the hole until you see the metal spoke, and remove as much foam as necessary to reveal the two holes.
![Image]()
10. Cut the plug on the paddle, leaving as much wire as possible, and slide the sleeve out. Put the sleeve thru the 11/54 hole. While being very careful with the wire on the paddle, thread it through the sleeve from the back, and test fit the paddle. Always remove and put away the paddle and wiring on the side before you carefully cut more foam, working your way out, until the whole shift paddle can tightly fit, then start digging deeper.
11. Once it fits perfectly, remove paddle and wiring again, and turn the wheel over. From the side under the audio controls, remove some foam around the 3/16" hole, so that the screw we are going to use can sit snug on the metal surface. You may use a knife, a larger drill bit with a lot of care, or a dremmel.
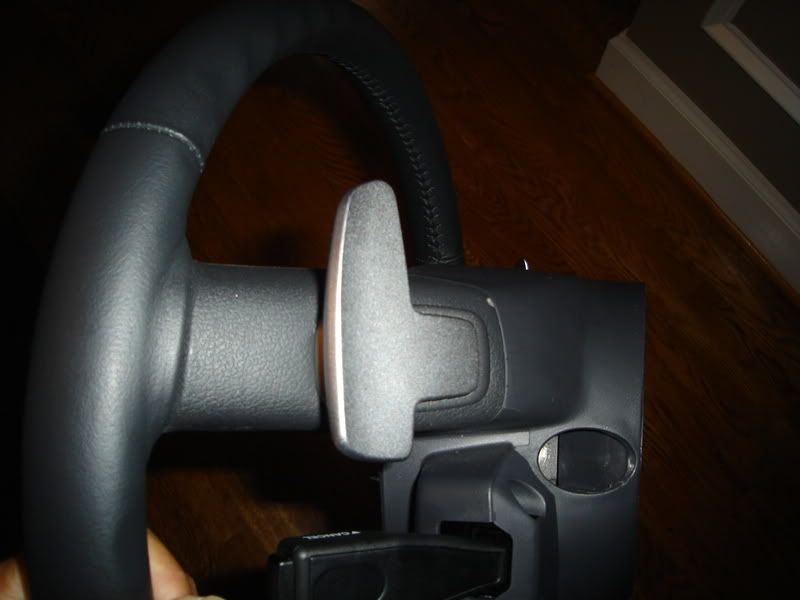
12. Install the paddle, and use the 4mmx16mm cap screw to secure the paddle. Do not overtighten the screw. The paddle side is only plastic, and you are tapping it as you put the screw in for the first time.
13. Repeat with the other paddle.
![Image]()
![Image]()
![Image]()
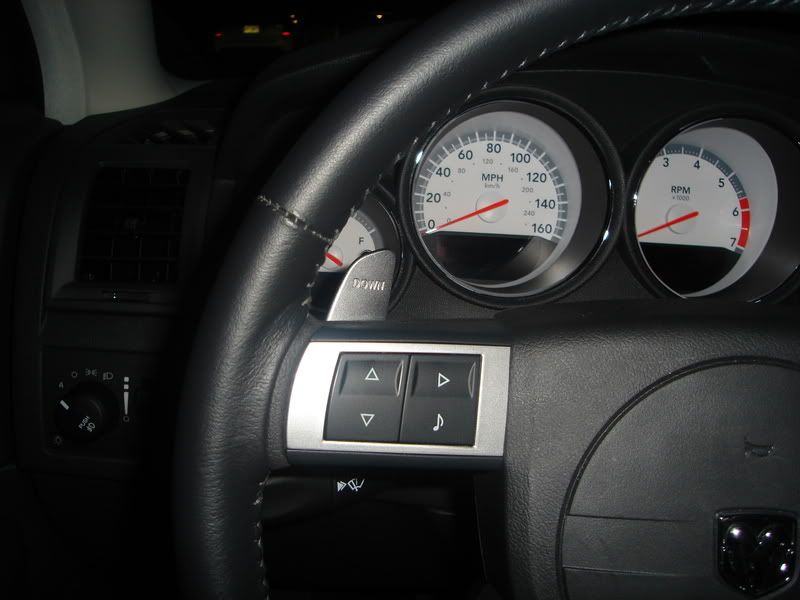
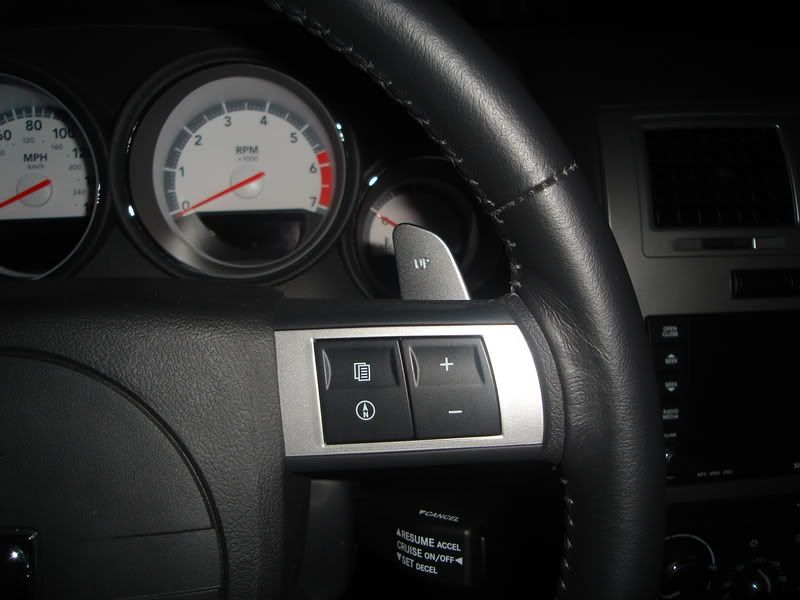
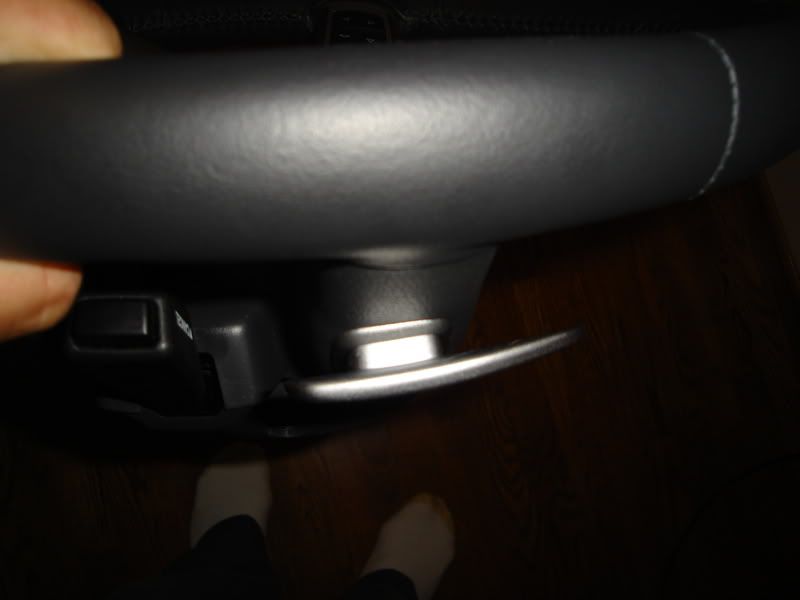
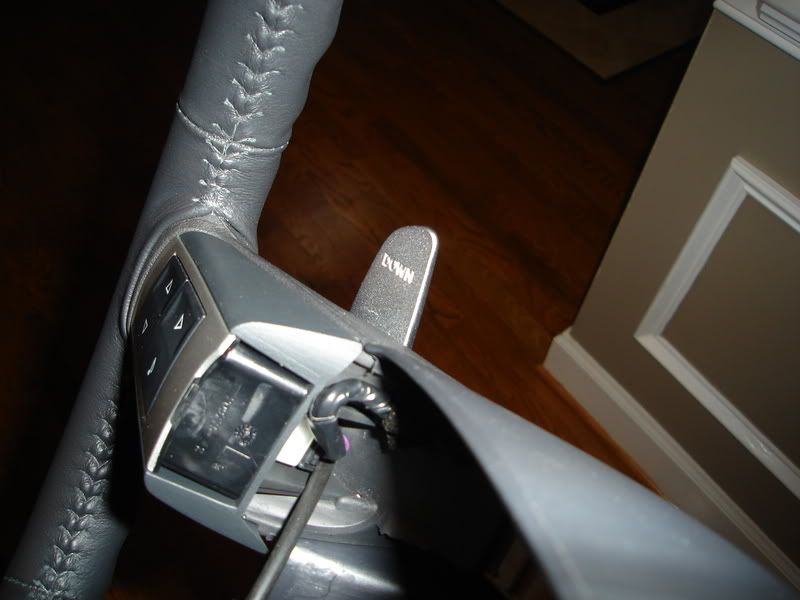
14. Test operation. Use an ohm-meter (never try it with simple battery and light bulb, will fry circuit) to test the paddle closing of circuit. Screwing too tight in step 12 may affect operation. Feel if the button location is good enough for driving. To ensure safety, hold the wheel as if you are driving and see if they interfere with your driving. If they interfere with your natural driving habit, stop and replace the steering wheel with an unmodified one and do not try this again.
![Image]()
![Image]()
![Image]()
15. Install ShiftHammer if you have it already. I had to skip to 16 because mine has not arrived yet.
16. Reverse steps 3, 2, and 1. Make sure to use blue Loctite on threads when reinstalling the steering wheel mounting screw.
![Image]()
![Image]()
This mod took me about 4 hours, but I spent 15 minutes waiting for the airbag to disarm, a lot of time thinking, test fitting different length screws, and exploring different methods. I expect with the instructions and an impact wrench, it should take about 2 hours.
Here are the tools you will need:
1 pair of Mercedes AMG S63 Aluminum Shift Paddles
10mm Hex bit for the steering wheel screw
blue Loctite
T-20 Torx bit
11/64" drill bit
3/16" drill bit
modelling xacto blade
Here are the screws you will need to buy:
two 4mm x 16mm long cap screw socket
(Home Depot UPC code 30699 82578)
WARNING, do not use philips flat head for countersunk holes, you WILL strip it. Been there, done that. Poor fit, had to buy extractor.
Instructions:
1. Remove the steering wheel. Follow instructions from other posts.
2. Remove the audio control modules.
3. Using the T-20 Torx bit, unscrew the Torx screw behind and remove the audio control module bracket.
4. Put on eye protection.
5. Use the corner of a table, use one hand to hold down the steering wheel by the spoke, making the back of the spoke (where the shifter is going to be) flat and horizontal to the table. With the other hand, drill a 3/16" hole at the ridge as shown, as straight to the back as possible.
6. At about 1/2" from the 3/16" hole towards the center of the steering wheel drill a 11/64" hole. This is to feed the control wires thru.
7. With a phonebook behind the spoke to protect the table, drill all the way thru the 3/16" with the 3/16" bit, try to be perfectly perpendicular with the phonebook.
8. Use the thru hole on the back of the spoke to line up with the shift paddle screw hole, and start cutting the foam, beginning with a hole about 5mm undersize on all sides.
9. Keep digging the hole until you see the metal spoke, and remove as much foam as necessary to reveal the two holes.
10. Cut the plug on the paddle, leaving as much wire as possible, and slide the sleeve out. Put the sleeve thru the 11/54 hole. While being very careful with the wire on the paddle, thread it through the sleeve from the back, and test fit the paddle. Always remove and put away the paddle and wiring on the side before you carefully cut more foam, working your way out, until the whole shift paddle can tightly fit, then start digging deeper.
11. Once it fits perfectly, remove paddle and wiring again, and turn the wheel over. From the side under the audio controls, remove some foam around the 3/16" hole, so that the screw we are going to use can sit snug on the metal surface. You may use a knife, a larger drill bit with a lot of care, or a dremmel.
12. Install the paddle, and use the 4mmx16mm cap screw to secure the paddle. Do not overtighten the screw. The paddle side is only plastic, and you are tapping it as you put the screw in for the first time.
13. Repeat with the other paddle.
14. Test operation. Use an ohm-meter (never try it with simple battery and light bulb, will fry circuit) to test the paddle closing of circuit. Screwing too tight in step 12 may affect operation. Feel if the button location is good enough for driving. To ensure safety, hold the wheel as if you are driving and see if they interfere with your driving. If they interfere with your natural driving habit, stop and replace the steering wheel with an unmodified one and do not try this again.


15. Install ShiftHammer if you have it already. I had to skip to 16 because mine has not arrived yet.
16. Reverse steps 3, 2, and 1. Make sure to use blue Loctite on threads when reinstalling the steering wheel mounting screw.